
I take a lot of photos. Some might say too many, but digital is cheap and my skills are weak so I feel my best chance is to take too many and then weed out the bad ones. I'd say the ratio of good to bad is about 1:100, so I pretty much have to take a lot of photos.
Weeding is very important, because I process every single photo before I publish it. (Publish? That sounds too official for what I do. I just put 'em on websites for nobody to look at.) That would be a lot of work, if I processed all the bad ones, too. Mostly, I use Photoshop to tighten the photos up; darken the darks and lighten the lights. It can make a pretty profound difference. There is an auto-level correction function in Photoshop, but I rarely use it because it often fixes things that I don't want fixed. For example, it finds orange to be unnatural and will lessen the amount of orange for you no matter how much orange is supposed to be there. So I do the settings manually.
Lately, I have also been doing some extra processing to my photos. These extra steps include exaggerating focus, colour saturation and contrast. With just a few changes, a basic photo can have much more character. I'll show some examples...
1. The Salaryman Shuffle
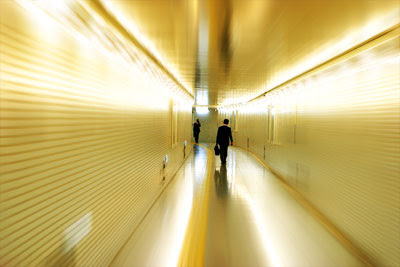
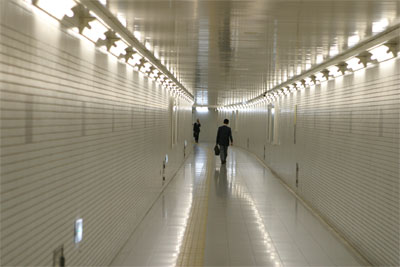 Salaryman shuffle - original photo
That's a photo I took in Kyoto, in a tunnel leading to the subway. This version is the photo without any processing at all.
Below is a look at the levels dialog box in Photoshop. It shows a histogram, which tells you how many dark, mid and light pixels are in your image. You can see that there is a bunch of space on the left (dark) side, which means either your photo doesn't have much dark in it, or your levels need some tweaking (or both).
 Levels nudged inwards
Note how the dark and light arrows along the bottom of the histogram have been nudged inwards. That's what I set them to get the following...
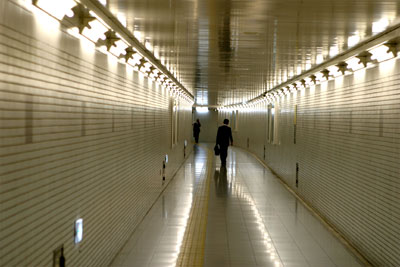 Darks darker, lights lighter
See how the star shapes in the lights along the top of the wall stand out? I like that. However, now the two men in the centre of the photo get lost in the shade. It's maybe a bit darker than is necessary, so I also did a more subtle version:
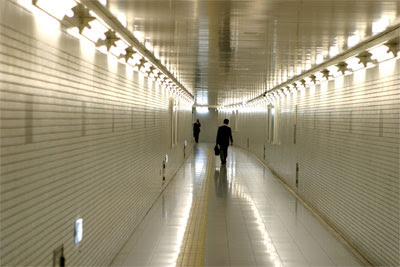 Subtly altered
Anyways, you can easily see that it makes the photo look crisper. Whether or not that makes this particular photo look better, I'll leave up to you to decide. Certainly, other photos are improved by the technique. Maybe a better example is the Big In Japan image I'm profiling after this one... Oh well.
Next up is the heavily processed version of the photo. I wanted to give it a sense of movement and unreality. To do this, I increased the saturation of the colour, sharpened the center and blurred the edges and then increased the contrast. This takes several masked layers and some effects.
First, bump up the saturation. Then make another copy of the photo in a new layer. Add a layer mask and put a radial gradient into it, with its centre on the point you want to highlight. (In this case, the salaryman.) Duplicate that layer and invert it mask. On one new layer (the one with the centre visible) use a sharpening tool to make it extra-sharp. On the other layer, use a blurring effect. (For this one, I used a radial blur set to zoom.) Then do a copy all and paste into a new layer on top. Change the layer mode to "Hard Light" and fade that layer's opacity until you like it. I get this:
 Looks like sci-fi
2. Big In Japan
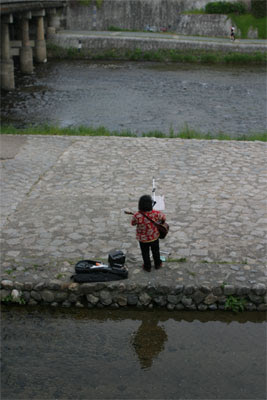 Big In Japan - unprocessed photo
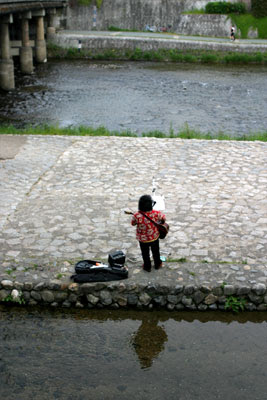 Levels-adjusted photo.
I think maybe it's easier to see the benefits of adjusting the levels with this photo. The original was much more dull. And then there is the heavy-effects version, using pretty much the exact same steps as above*:
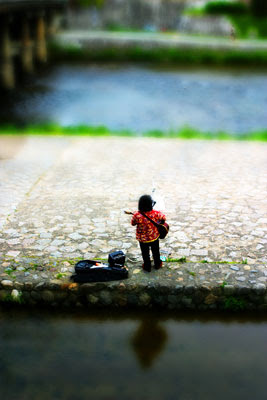
There you have it. You don't have to do too much to a photo to make it go from dull to crisp to vibrant. To see it a little bit more easily, here's all three versions together:
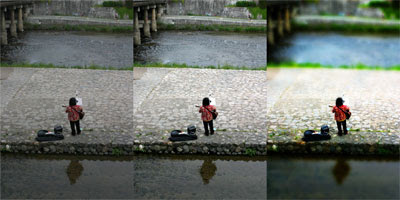
* I used a different blur on this one. Instead of a radial zoom blur, I did a regular Gaussian blur, with the mask a linear gradient. This can have the effect of making the photo look strangely like a photo of a tiny replica! See here for more info.


No comments:
Post a Comment